Locating the Import Template
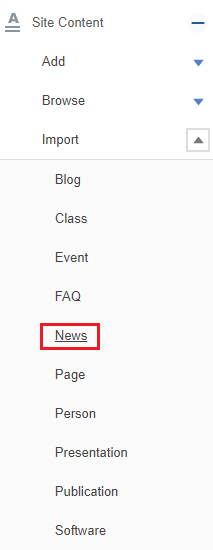
- Navigate to the control panel
- Click on Site Content
- Click on Import
- Choose the type of content you want to Import from the enabled App list. Learn how to Enable an App.

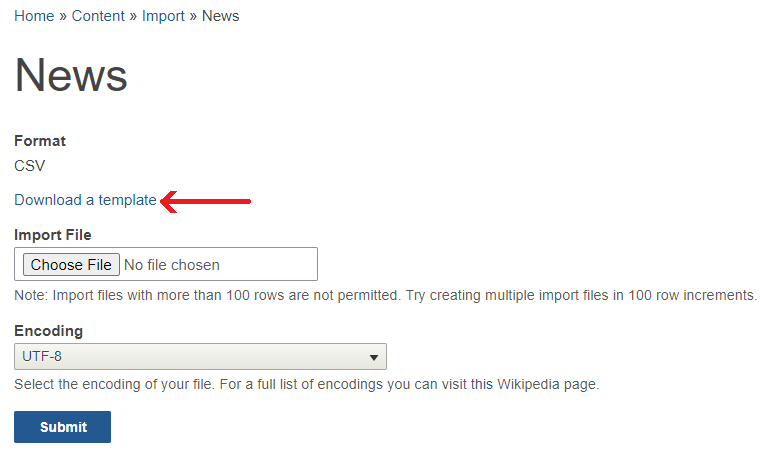
Content that can be imported will have a link to a downloadable excel spreadsheet template. (see image below)

Importing News - Navigating the Downloadable Template
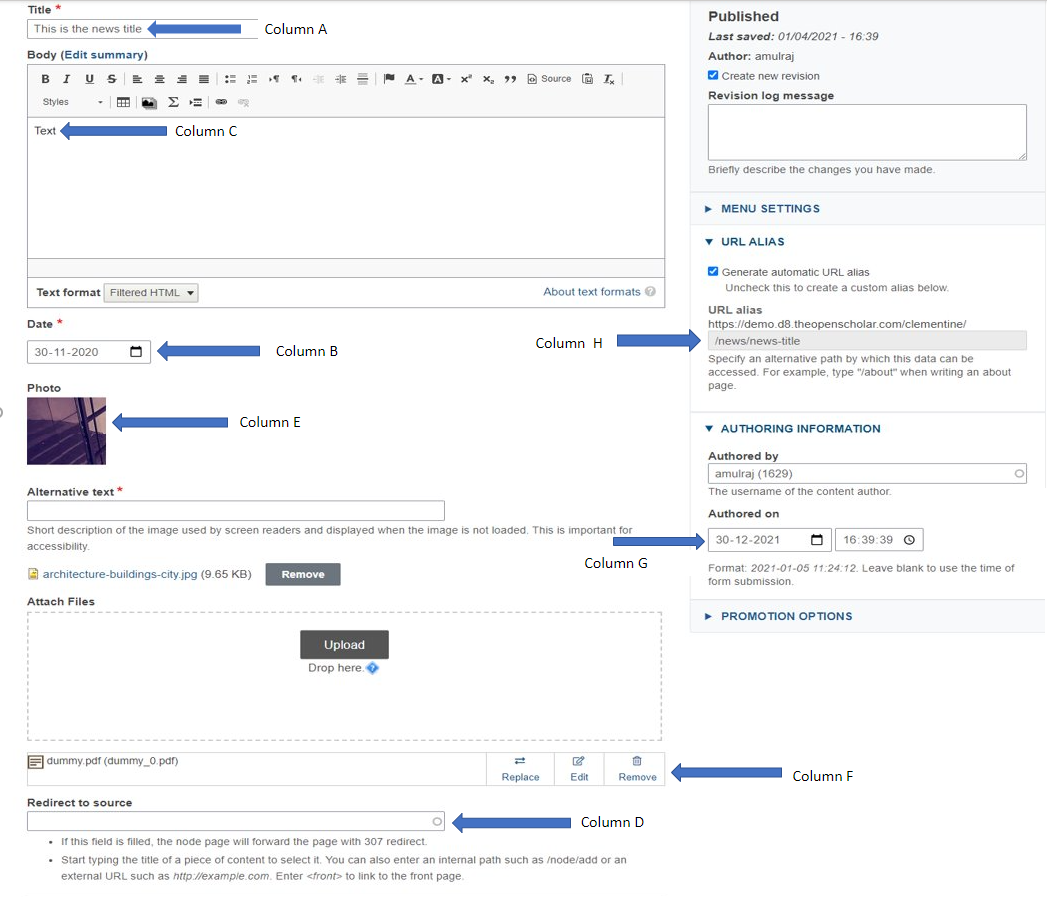
News Template Site View

Note: The first row is reserved for the field titles and optional taxonomy vocabulary fields. Do not remove or alter text in the first row from the template.
COLUMN A: News post title

COLUMN B: News post date
NOTE: Date must be entered as, Oct 2 2018 or Oct 02 2018 otherwise, import will stop and show error message

COLUMN C: News post Body (Text Content)
Note: It is recommended to add the HTML version of your text in this field.
Please be aware if you are inserting a large amount of text here, the import might result in missing content because it will not be able to handle large amounts of text. Please avoid using ASCII characters in your text as this will result in import errors.

COLUMN D: News Redirect to field
Note: This field is optional.
Use this field if you are planning to link this news post to an external site.

COLUMN E: News images
Note: This field is optional.
Use this field if you want to add a featured image to go along with your news post.
Images should be entered here as URL paths.These images should already exist either on your site or on an external site. You cannot upload a local file from your computer here. To learn how to add files to your site prior to import, see Adding Files

COLUMN F: News Files (Images or documents)
Note: This field is optional. Files added here will import over as attached downloadable files.
Files should be entered here as URL paths.These files should already exist either on your site or on an external site. You cannot upload a local file from your computer here. To learn how to add files to your site prior to import, see Adding Files

.
COLUMN G: News Created Date
Note: This field is optional.
Leaving this field blank will result in all imported events having the same date (date of import), this is different then the news post date.

.
COLUMN H: News Path (URL Path)
Add the URL path ending here. For example, instead of adding help.theopenscholar.com/news/news-path, you'll just need to add news-path.

Importing more than 100 News Posts at one time is not permitted. If your CSV file is over 100 rows, you will receive an error.
Saving your CSV File
Make sure to save your CSV file using the UTF-8 file format to ensure that your contents are imported without issue.
The Import Process
- Navigate to the control panel
- Select Site Content
- Click Import
- Select News
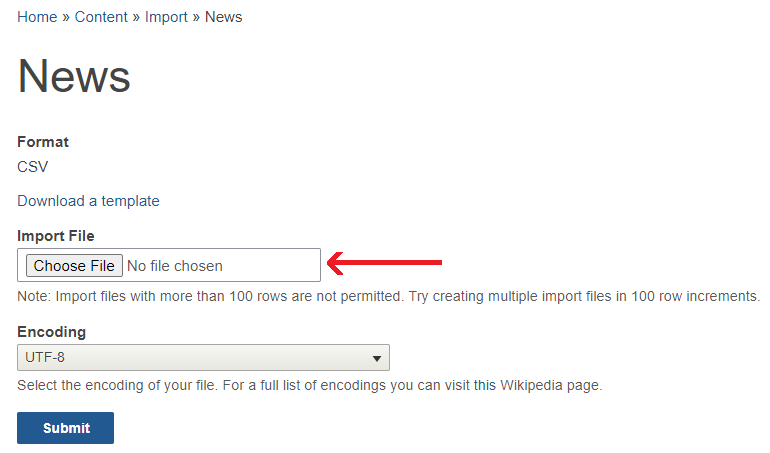
- Upload the news.csv file

- Click Submit
- Navigate to Site Content > Browse > Content > Type: News to view news.


